

SolidWorks: Classical Guitar
/Download all 46 training videos (in MP4 format) plus extra files and resources for a single, one-time fee.
- No memberships.
- No recurring payments.
- Download and keep forever.
- View on any device, any time.
- No ads. No spam. No bloatware.


Pull out your sombreros my children, it’s time to dance!
Over the next few weeks we will be building a fully functional flamenco-style guitar that is ready to be machined, assembled, and played! Starting in SolidWorks, we will build the model with accurate, precise measurements that will enable the guitar to sound like hot salsa to the ears if built and played.
Contents

Part 1: Getting Started
Today we’ll use symmetry planes to accurately setup the measurements that drive the whole model. Trust me, by taking these steps now will majorly make your day when it comes time to fine-tune the dims! Kill it.
- Preview (07:30)

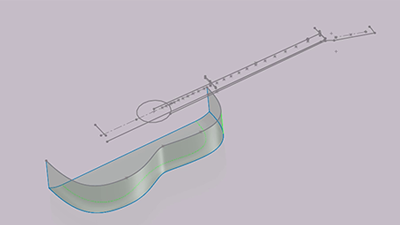
Part 2: Body & Neck Profile
Now that we’ve got some of our most essential datum (aka ‘reference’) elements in place, we can start creating our sketches.
- Set Up the Sketch (08:35)
- Body Profile (02:35)
- Neck & Head Profile (07:24)

Part 3: Fretboard Profile
Okay kids, you’ve been hanging in there this long. In this part we’ll be finalizing our fretboard and sealin’ the deal for our next phase of the project.
- Fretboard Design Table (06:20)
- Fretboard Profile I (09:02)
- Fretboard Profile II (07:37)
Part 4: Surfaces
Today we’ll begin digging deeper into the master model we’ve been developing the past 6 videos. Starting with the body, we’ll begin to add surfaces by utilizing the existing geometry that we set up previously. Buckle your seat belts, this is going to go quick!
- Surfaces I (11:35)
- Surfaces II (05:55)

Part 5: Fretboard
In this video we’ll start to see the physical form of our guitar come together based on the sketches we’ve been building. We’ll be going over some common problems as well as some shortcuts.
- Fretboard I (08:24)
- Fretboard II (07:01)
- Fretboard III (06:11)
- Fretboard IV (05:01)

Part 6: Body Details
In this segment, we’ll be creating an assembly to start bringing in our guitar components.
- Soundboard (06:41)
- Sides (02:46)
- Back (03:47)
- Saddle & Bridge (08:41)

Part 7: Neck Surfaces
In this video, we’ll start to build the neck surfaces of our guitar. Ready? Let’s do it!
- Neck Surfaces I (06:45)
- Neck Surfaces II (05:01)
- Neck Surfaces III (04:47)
- Neck Surfaces IV (03:10)

Part 8: Headstock
Well now that we have our neck surfaces taken care of it’s time to move on to the headstock. Rock!
- Headstock I (03:52)
- Headstock II (04:21)
- Headstock III (04:03)
- Neck Details (04:58)
- Making Changes (04:05)

Part 9: Peg
Now that our guitar is starting to take shape, it’s time to add some strings. Before we do strings however, we need to create pegs to hold the strings in place.
- Peg (Moving Object to Origin) (06:00)
- Peg Key (06:53)
- Peg Key Blending (03:44)
- Peg Pattern (01:40)
- String Spacing (04:32)

Part 10: Nut
In this video we’ll be creating the nut. There are many ways to approach this, but for this assembly we’ll be taking a shortcut. Let’s get to it!
- Nut I (07:28)
- Nut II (05:00)
- Nut III (04:31)

Part 11: Adding Details I
In this segment we'll be adding some more details to our epic classical guitar.
- Cosmetic Frets (07:44)
- Bridge Tie-Ins (04:37)
- Saddle Width (01:18)

Part 12: Strings
We’re going to be getting messy for a sec here folks. While adding strings to our model is unnecessary for manufacturing purposes, it is necessary for visualization purposes. In this video we’ll go over how to setup a sketch to add strings to your guitar.
- Strings I (04:23)
- Strings II (05:10)
- Strings III (03:45)
- Strings IV (02:18)
- Strings V (02:23)

Part 13: Adding Details II
In this segment we'll be adding final details to our guitar.
- Pick Guard (06:24)
- Fret Inlays I (03:45)
- Frey Inlays II (04:07)

Part 14: Finishing Up
In this video, we’ll go back into the history tree and take a look at adjusting one of our earliest sketches and ensure that all of the other features we did afterwards update accordingly. And of course we'll be adding a inlay logo for our headstock. Rock.
- Adjust Body Shape (05:02)
- Logo Inlay (05:21)
Topics
Overall
Master Model
Sketch Tools
Surface Tools
Assemblies
Features
Sketches
Creating Clean Splines
Constraints
Dimensions
Equations
3D Space
Arcs
Surfaces
Swept Surfaces
Extrude up-to Surface
Curvature-Continuous Blends
Cutting with a Surface
Surfacing Techniques
Knitting
Surface to Solid
Sweeping Profiles
Features
Fillets
Extrude Cuts
Mirror Tool
Trimming
Drafts
Merging Bodies
Projections
Patterns
Assemblies
Inserting Parts
Mates
Origin
External References
Modifying Master Model
Appearance
Materials
Transparent Views
Importing from Adobe Illustrator
And much...
Much more!