

MODO Modeling for ArchViz
/Download all 17 training videos (in MP4 format) plus extra files and resources for a single, one-time fee.
- No memberships.
- No recurring payments.
- Download and keep forever.
- View on any device, any time.
- No ads. No spam. No bloatware.

In this series we'll be looking at modo for modeling and rendering a simple architectural interior, complete with dimensional accuracy.
Contents
Part 1: Windows
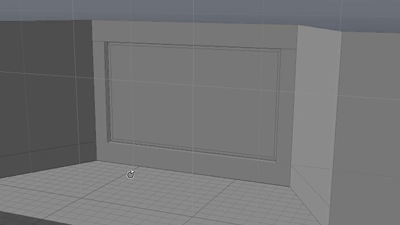
We'll start this series by building a simple room using units and grids. We will prepare sections for our doors and windows. After that we'll get into more details.
- Windows I (09:47)
- Windows II (08:03)
Part 2: Muntins
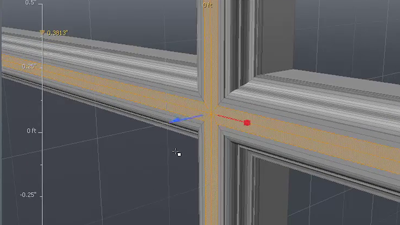
Moving right along in our series, we’ll start to build the windows that we’ve previously taken a look at.
- Muntins I (06:45)
- Muntins II (09:45)

Part 3: French Doors
Now that we have our basic framework set up, we can start to finalize details on our french doors. In adding to the realism of the scene, we’ll want to be able to move the french doors realistically when it comes time to setup our final scene. Break out the iced tea!
- French Doors I (06:26)
- French Doors II (09:19)

Part 4: Top Windows
Whew! Now that we have our french doors in place, we can start installing our top windows. We’ll use the same geometry-snapping and edge-profile techniques we used for the doors to accurately space out our window segments. We’re gettin’ there!
- Top Windows I (05:05)
- Top Windows II (15:20)
Part 5: Roof & Rafters
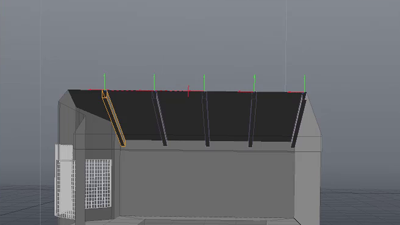
Now that we have the basic setup of our structure, it’s time to add the roof. In this segment we’ll be setting up what will eventually be our ceiling and profile for setting up our rafters.
- Building the Roof (05:38)
- Rafters I (06:54)
- Rafters II (05:48)

Part 6: Railing
We’ll start working on our railing. By offsetting a portion of the second floor, we’ll be able to easily work with some new geometry that’s perfectly in line with our floor cutout.
- Railing I (04:27)
- Railing II (05:52)
- Railing III (08:51)

Part 7: Render
In this video we’ll take a look at how we’re going to control the lighting in our scene and setup our basic render scene. We'll also take a look at portal lights.
- Render I (05:33)
- Render II (04:10)

Part 8: RepGlass (Bonus)
We’re going to take a look at our replicator glass and some techniques for creating a stained-glass effect. By using the gradient editor, we’ll be able to randomly color our individual glass frames.
- RepGlass (06:08)